Introduction
One of the main problems with the creation of bitmap based materials is getting them to look as though they repeat or tile seamlessly across a rendered surface. This tutorial explains the various ways by which this can be achieved.
 | 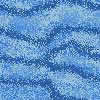 |
| bluewave1.jpg | bluewave2.jpg |
By way of an illustration of the problem, look at the two bitmap tiles illustrated on the right. They are both 100px by 100px. They are both JPEGs and superficially they both look similar. However, when used as a material, one of them displays obvious seams while the other doesn't. The bluewave1.jpg image was created simply by scribbling with the Airbrush Tool in Photoshop. The bluewave2.jpg image has been tweaked so that it will tile seamlessly. The rendered result of each of these two images are illustrated below. The material based on the bluewave1.jpg image is shown on the left and the material based on the bluewave2.jpg material is shown on the right. The bluewave1 material displays obvious vertical seams. In this case, the horizontal seams aren't too obvious but that's more a case of luck than judgement. What we need is a sure fire method of creating a material that can be tiled without showing any seams.
 |  |
| bluewave1 material exhibiting "seams" | bluewave2 material tiling "seamlessly" |
So, how can an image be tweaked to avoid such seams? At the heart of this technique lies the Photoshop Offset filter. You may have been working with Photoshop for some time and never come across this filter but this is exactly the purpose for which it was designed. Let's first have a look at how bluewave2 was created.
 Creating the bluewave tile
- Start Photoshop and open a new image, from the pull-down menu. Set the new image size to 100px by 100px. Select a pale blue as the foreground colour and then use the Paint Bucket Tool
 to flood fill the new image. Select a slightly deeper blue and then use the Airbrush Tool
  to draw some blobs on the background. Select a dark blue and use the Airbrush Tool again to draw some wiggly lines. You can build up deeper textures by repeating this process a number of times. When you're done, the image should look something like the one on the right.
 - Use the pull-down menu to start the Offset Filter, The Offset Filter dialogue box appears and offers just a few options.
 The first thing we must do is enter values for Horizontal and Vertical offset. In each case, the offset value should be set to exactly half of the full size of the bitmap. In our case, since the bitmap is 100px by 100px, the offset values for both the horizontal and vertical directions should be set to 50px.
The option for Undefined Areas must be set to "Wrap Around" in order to get the effect we need.
When you have made the settings shown in the illustration above, click the OK button to apply the filter. When you have done this, your image should look something like the one shown on the right. Notice that we now have the edge seams running across the middle of the image. This is because we have offset the image by half of its width and height and wrapped it round. We now have the opportunity to do something about the seams. - Use the Airbrush Tool with the same colours you used previously to join up the wiggly lines across the seam. Since we know that the edges of the image already wrap around, thanks to the Offset Filter, all we need to do is eliminate the visible seam in the middle of the image to produce a truly seamless tile. The finished result should look something like the one shown on the right.
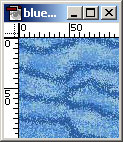 Finally, save the file as a JPEG using the Save for Web option, This will give you the opportunity to control the compression level. Remember to save the file to your textures folder so that it can easily be found in the future. To test the tile, create a new bitmap material in AutoCAD, attach it to an object and render it. See the Creating Custom Bitmap Materials tutorial for more details.
The sequence above illustrates just one strategy for creating seamless tiles. Although in every case, the Offset Filter should be used, there are lots of different ways you might go about building up the texture. For example, one of the simplest methods is illustrated below.Other Strategies
 |  |  |
| 1. Make a random pattern of splodges but keep away from the edges of the image. | 2. Use the Offset Filter to offset half the bitmap height and width and Wrap Around. | 3. Simply fill in the gaps with more splodges and Hey Presto! you have a seamless tile. |
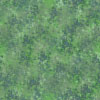 |
| scrub.jpg |
If this simple 3 step process is repeated a number of times, you can create beautiful deep seamless textures. After 3 or 4 more iterations using different colours, the tile above finished up as the scrub.jpg file shown on the right. The result of and AutoCAD render using our Garden.dwg file is shown below.

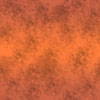
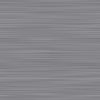
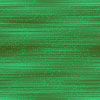
To get some really good results, you need to experiment. Try using different Photoshop filters, consider using Layers to build up your textures. The textures below are the result of a few minutes experimentation using various brushes, the noise and blur filters and gradient fills; they are all completely seamless. The possibilities are almost limitless.
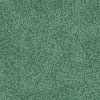 |  |  |  |
| bluegrass.jpg | furrow.jpg | steel.jpg | swamp.jpg |
To download any of the images above, right-click on them and select from the pop-up menu. Save the image to your textures folder and test them out as materials in AutoCAD.
No comments:
Post a Comment